
Instrumentation tube fittings are designed to create secure, leak-tight connections in systems carrying liquids and gases. When correctly selected, installed, and supported, they can provide reliable service under demanding pressure, temperature, and vibration conditions.
However, fitting performance depends on more than the fitting itself. Tube condition, preparation, installation technique, material compatibility, system alignment, and operating conditions all affect the integrity of the connection.
When leakage occurs, replacing or further tightening the fitting without identifying the cause may only provide a temporary solution. A structured inspection is needed to determine why the seal failed.
How an Instrumentation Tube Fitting Creates a Seal
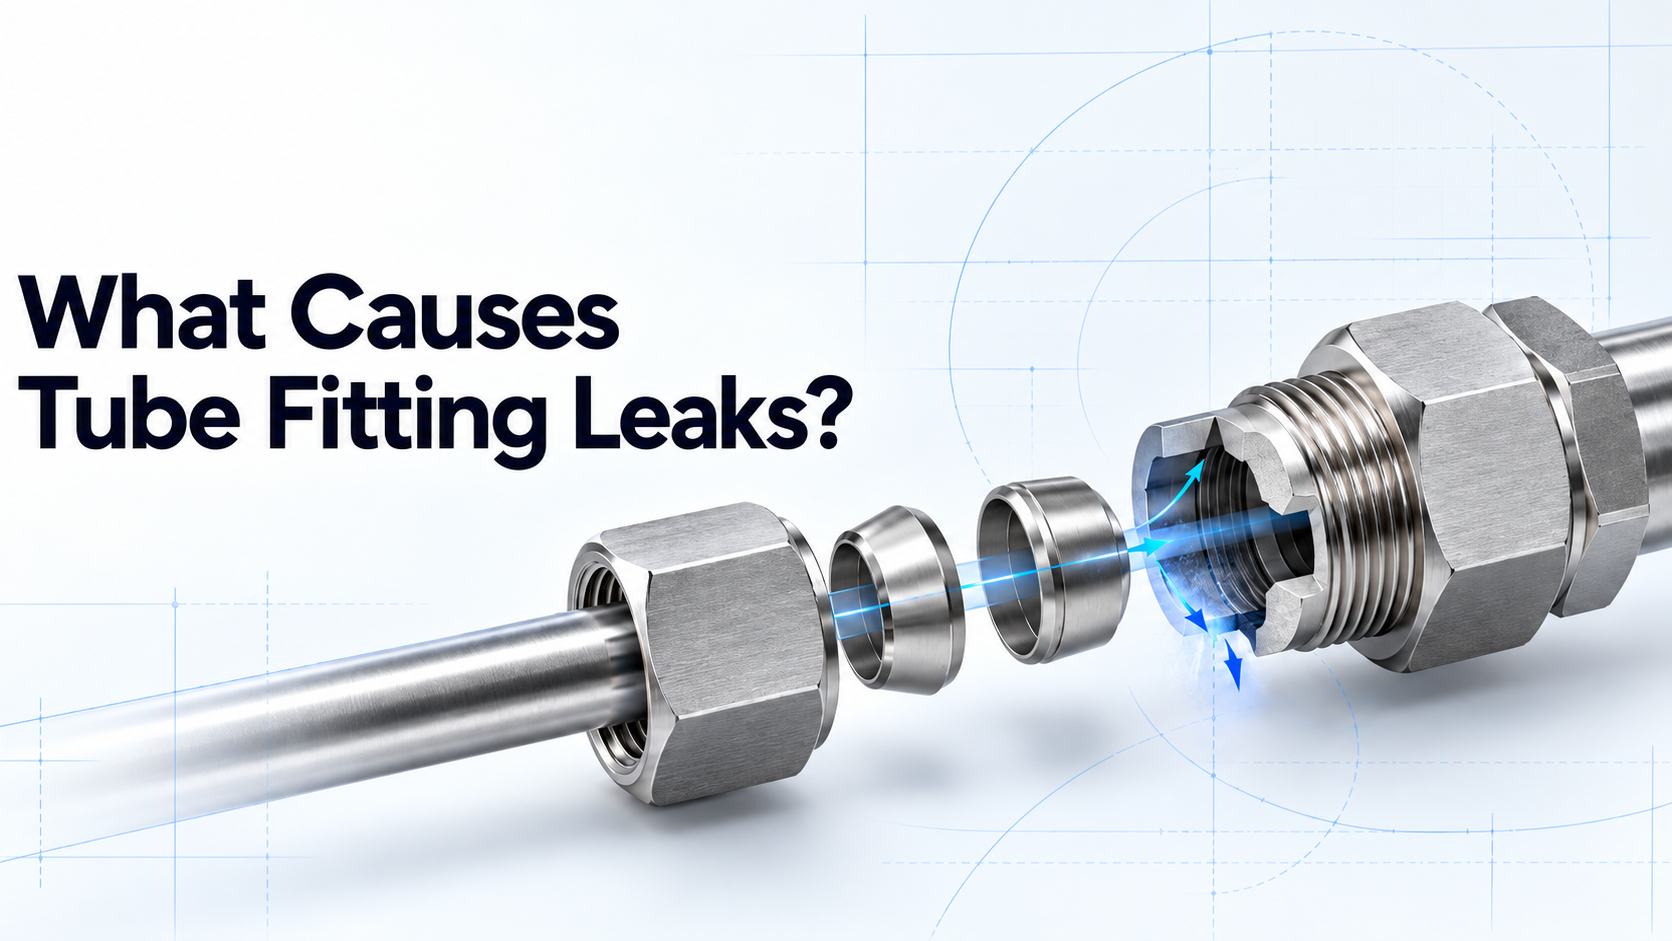
A typical compression tube fitting consists of a fitting body, nut, ferrule or ferrules, and tubing.
As the nut is tightened according to the manufacturer’s specified procedure, the ferrules move into position between the fitting body and the tube. This creates controlled contact with the tube surface and forms the mechanical grip and seal.
For this connection to perform correctly:
- The tubing must have the correct outside diameter and wall thickness.
- The tube surface must be suitable for sealing.
- The tube must be inserted fully into the fitting.
- The components must be correctly assembled.
- The nut must receive the specified amount of tightening.
- The connection must remain free from excessive external loads.
A problem with any of these conditions can compromise the seal.
1. Incorrect Tube Preparation
Tube preparation is one of the most important stages of fitting installation.
The tube should be cut squarely using an appropriate cutting method. A tube end that is angled, crushed, or heavily deformed may not seat correctly inside the fitting.
Burrs left after cutting can also interfere with insertion and may introduce loose particles into the system. The inside and outside edges should therefore be deburred without excessively chamfering or damaging the tube end.
Before assembly, inspect the tubing for:
- Angled or uneven cuts
- Internal and external burrs
- Scratches near the sealing area
- Dents or flattening
- Paint, scale, dirt, or oil
- Tube ends damaged during storage or handling
Deep longitudinal scratches are particularly concerning because they can create a path across the sealing area.
Tube ends should be kept protected until installation. Even correctly prepared tubing can become unsuitable if it is dragged across a contaminated surface or left exposed on-site.
2. Incomplete Tube Insertion
The tubing must reach the intended shoulder or stop within the fitting body before the nut is tightened.
If the tube is only partially inserted, the ferrules may grip it in the wrong position. The connection may initially appear secure but fail to develop the intended sealing geometry.
Incomplete insertion commonly occurs when:
- The tube route is slightly too short.
- Misalignment prevents the tube from entering freely.
- Burrs or deformation obstruct insertion.
- The installer does not verify that the tube has bottomed correctly.
- The tube moves outward while the nut is being tightened.
The tube should enter the fitting without being forced sideways. Marking the tube at the nut before tightening can provide a simple visual indication of whether it has shifted during assembly.
3. Under-Tightening
A fitting that has not been tightened by the specified amount may not fully set the ferrules or establish the required seal.
This can leave insufficient contact between the fitting components and tubing. Leakage may become visible during pressure testing or only after the system experiences vibration, pressure changes, or thermal cycling.
Under-tightening can result from:
- Estimating tightness by feel
- Using an incorrect starting position
- Limited access for the wrench
- Confusing finger-tight assembly with completed installation
- Failing to follow the fitting manufacturer’s procedure
- Applying a procedure intended for a different fitting design or size
Installation requirements vary by fitting type, size, material, and manufacturer. Technicians should use the documented tightening method for the specific product rather than relying on a universal number of turns.
4. Over-Tightening
More tightening does not automatically create a better seal.
Excessive tightening can deform ferrules, damage the tubing, increase local stress, or make future inspection and disassembly difficult. It may also move the fitting components beyond their intended installation position.
A common response to a small leak is to continue tightening the nut. This should not be treated as a standard repair method. The line should first be isolated and depressurised, and the connection should be inspected according to the approved maintenance procedure.
If a fitting has been over-tightened, the affected ferrules, tube end, nut, and body may need to be replaced. Reusing damaged components can allow the same problem to return after recommissioning.
5. Tube Misalignment and Side Loading
A tube fitting should not be used to pull misaligned tubing into place.
When tubing enters the fitting at an angle, the ferrules may not contact the tube evenly. The connection may also remain under continuous bending force after installation.
Common causes include:
- Inaccurate tube measurements
- Poorly positioned bends
- Incorrect equipment alignment
- Insufficient clearance
- Unsupported tubing weight
- Thermal movement
- Forcing the final connection into place
The tube should naturally align with the fitting before the nut is tightened. If force is required to position it, the tubing route or bend should be corrected.
Misalignment can also transfer loads to connected valves, manifolds, and instruments. A connection that seals during installation may begin leaking after the equipment moves, heats up, or starts vibrating.
6. Vibration and Inadequate Tube Support
Vibration can place repeated stress on tubing and fittings. Over time, this movement may loosen connections, damage the tube near the fitting, or contribute to fatigue failure.
Risk is generally higher near:
- Pumps
- Compressors
- Reciprocating equipment
- Control valves
- Engines
- Unsupported instrument assemblies
- Long tubing runs
- Locations exposed to flow-induced vibration
Tube clamps and supports should control movement without crushing or damaging the tube. Their spacing and placement should account for tube diameter, routing, bends, equipment movement, and operating conditions.
A support positioned too far from the fitting may allow the tube to act as a lever. A support that is excessively rigid or incorrectly placed may transfer vibration instead of controlling it.
If leakage repeatedly develops at the same connection, the surrounding system should be inspected for movement. Replacing the fitting alone may not address the underlying cause.
7. Material or Size Mismatch
The tube and fitting must be compatible in size, material, hardness, pressure capability, temperature rating, and process service.
A fitting designed for one tube outside diameter should not be installed on tubing with a different nominal or actual dimension. Metric and fractional tubing can appear similar while being dimensionally incompatible.
Material selection also affects how the ferrules grip and seal. Tubing that is too hard for the fitting design may not deform as required. Tubing that is too soft may be excessively compressed or damaged during installation.
Other compatibility considerations include:
- Corrosion resistance
- Process media
- Operating temperature
- Galvanic interaction between dissimilar metals
- Tube wall thickness
- Pressure rating
- Surface finish
- Seamless or welded tube requirements
Mixing bodies, nuts, or ferrules from different fitting systems should be avoided unless compatibility has been explicitly confirmed by the responsible manufacturers. Similar appearance does not establish interchangeability.
8. Repeated or Incorrect Reassembly
Some tube fittings can be disconnected and reassembled, but only according to the manufacturer’s instructions.
Problems can arise when:
- Ferrules are removed and reinstalled incorrectly.
- Components from different connections are mixed.
- Dirt enters the fitting during maintenance.
- The tube end becomes scratched or bent.
- The nut is tightened as though it were a new installation.
- The original fitting position is not identified.
- The connection has already experienced excessive tightening.
- Worn or damaged components are returned to service.
Before reassembly, inspect the fitting body, nut, ferrules, and tubing. Damaged or contaminated components should not be reused simply because they can still be assembled.
Keeping mated components together during maintenance reduces the risk of incorrect interchange. The connection should then be remade using the documented reassembly procedure.
9. Contamination Inside the Connection
Metal particles, sealing compounds, dirt, fibres, paint, and other contaminants can interfere with the sealing surfaces.
Contamination may be introduced during:
- Tube cutting and deburring
- Outdoor storage
- Installation
- Painting or insulation work
- Flushing
- Maintenance
- Unprotected disassembly
Tube ends and fitting ports should remain capped until they are ready for installation. Tools and work surfaces should also be kept clean, particularly in high-purity, gas, hydraulic, and critical process applications.
Thread sealant should only be used where specified for tapered pipe-thread connections. It should not be applied to the ferrules or tube-sealing surfaces of a compression fitting.
10. Operating Conditions Beyond the Connection’s Rating
A fitting may be assembled correctly and still leak if it is exposed to conditions beyond its rated capability.
The complete connection should be evaluated for:
- Maximum operating pressure
- Test pressure
- Pressure surges
- Minimum and maximum temperature
- Thermal cycling
- External loads
- Vibration
- Corrosive media
- Gas service
- Fire or environmental exposure
Pressure and temperature should be reviewed together because allowable pressure can change with temperature.
The system rating is determined by its lowest-rated component. Suitable tubing is therefore just as important as the fitting’s stated rating.
How to Investigate a Leaking Tube Fitting
Before inspecting any suspected leak, isolate and depressurise the system according to the approved safety procedure. Hazardous media may require additional draining, purging, ventilation, and personal protective equipment.
Once the connection is safe to inspect:
- Confirm the precise source of the leak.
- Review the fitting model, size, material, and service rating.
- Check whether the correct tubing was used.
- Inspect the tubing route for stress, vibration, and misalignment.
- Review how the tube was cut, deburred, inserted, and tightened.
- Check for scratches, deformation, corrosion, or contamination.
- Determine whether the fitting has previously been disassembled.
- Replace damaged components rather than attempting to tighten through the problem.
- Reassemble according to the correct manufacturer procedure.
- Complete the required pressure or leak test before returning the line to service.
Leak-detection methods must be suitable for the process media, test pressure, and site requirements. Never use hands to search for leakage in a pressurised system.
Preventing Tube-Fitting Leakage
Most avoidable leakage can be reduced through consistent installation and inspection practices:
- Specify compatible tubing and fittings.
- Protect tube ends during storage and handling.
- Cut tubing squarely and deburr it correctly.
- Inspect the sealing area for scratches and deformation.
- Insert the tube fully before tightening.
- Follow the product-specific installation procedure.
- Align tubing before completing the connection.
- Provide appropriate clamps and supports.
- Keep components clean during assembly and maintenance.
- Follow the correct reassembly procedure.
- Test and inspect the completed line before commissioning.
- Train technicians using the actual fitting systems installed at the plant.
Conclusion
Tube preparation, insertion depth, tightening, alignment, vibration, material compatibility, contamination, and previous maintenance can all influence whether a tube-fitting connection seals reliably.
An effective response to leakage begins with inspecting the complete connection and determining which installation or operating condition allowed the leak to develop. Further tightening without identifying the cause may leave the underlying problem unresolved.